Why Your Toilet Keeps Running
A toilet that runs continuously - or cycles on and off every few minutes - is wasting water and quietly inflating your utility bill. The good news: the fix is almost always mechanical, confined to the three main components inside the tank, and well within reach of a confident beginner.
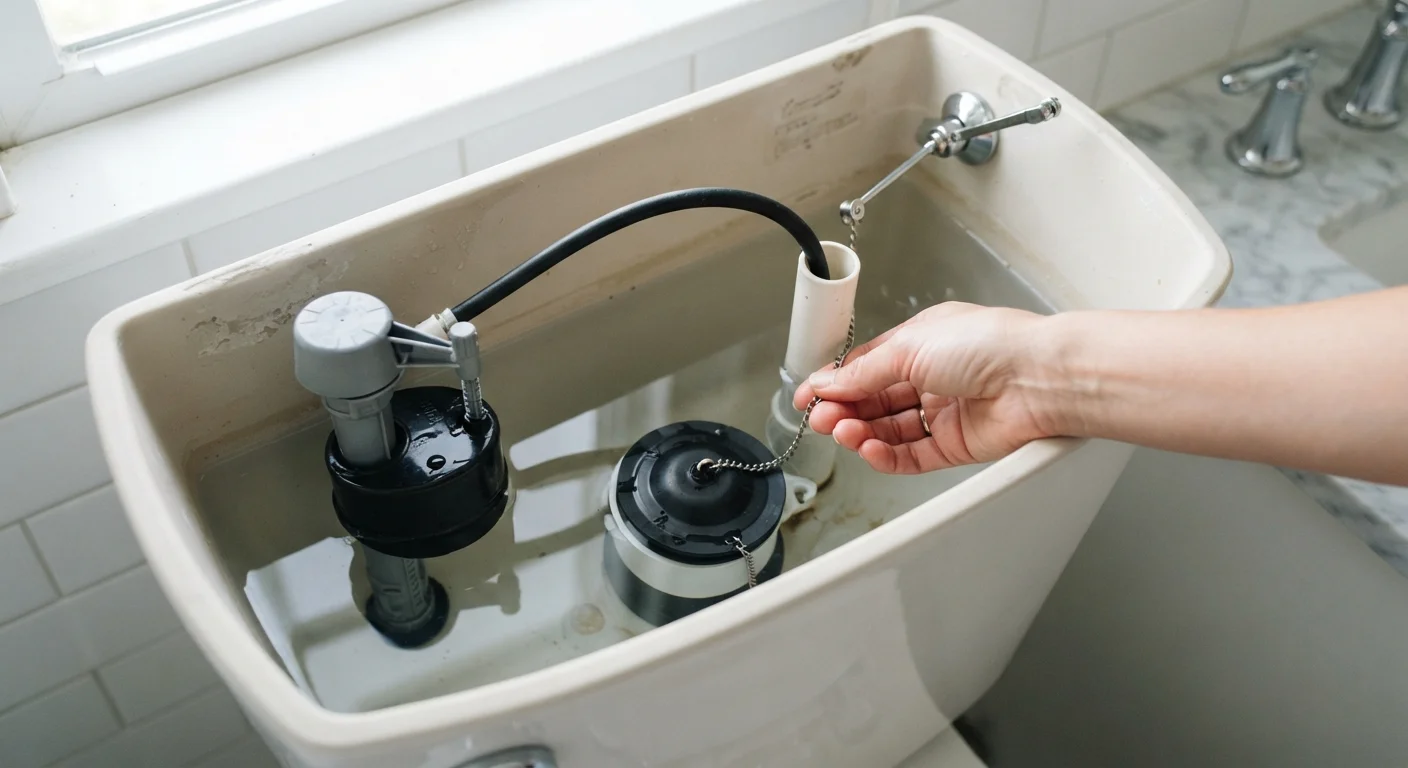
Understanding how a toilet works makes diagnosis straightforward. When you flush, the flapper (the rubber seal at the bottom of the tank) lifts to release water into the bowl. As the tank drains, the float drops and triggers the fill valve to refill the tank. Once the water reaches the correct level, the float rises and shuts off the fill valve. If any of these components fail, water runs non-stop.
Three culprits account for the vast majority of running toilets:
- Worn or warped flapper - allows water to seep from the tank into the bowl continuously.
- Incorrectly set float - causes the tank to overfill, sending water down the overflow tube.
- Failing fill valve - cannot fully shut off even when the float reaches the correct height.
What you will need
Diagnosing the Problem
Before you reach for replacement parts, spend a few minutes identifying which component is at fault. Accurate diagnosis saves time and money.
The Dye Test (Flapper Check)
Drop a dye tablet - or a few drops of food coloring - into the tank. Do not flush. Wait ten minutes, then check the bowl. If the water in the bowl has taken on the color, your flapper is leaking and needs to be replaced.
The Overflow Tube Check (Float Check)
Remove the tank lid and look at the central tube - the overflow tube - while the tank is full. If water is trickling or running into it, the float is set too high and the tank is overfilling. You can confirm this by pressing the float down gently: if the fill valve shuts off, adjusting the float height will solve the problem.
The Fill Valve Check
If neither test identifies the culprit, the fill valve itself is likely worn. Listen for a hissing sound even after the tank appears full, or push the float all the way down and observe whether the valve closes completely. A valve that won't fully shut needs to be replaced.
Take Your Old Part to the Store
Toilet flappers and fill valves are not fully standardized across manufacturers. Bringing the old part with you - or photographing the toilet's brand and model number stamped inside the tank - makes it much easier to find a compatible replacement. Universal parts work well in most cases, but an exact match eliminates guesswork.
What You'll Need
Gather the following before you begin. Having everything on hand prevents mid-repair trips to the hardware store.
Adjustable pliers
Used to loosen and tighten the fill valve lock nut during valve replacement.
Replacement flapper
Restores the watertight seal at the bottom of the tank if the dye test confirms a flapper leak.
Universal fill valve kit
Replaces a worn or faulty fill valve that won't shut off completely.
Sponge and bucket
Used to remove remaining water from the tank before replacing internal components.
Dye tablets or food coloring
Used during the dye test to detect a leaking flapper without disassembly.
Towel or small mat
Placed under the tank to catch any drips during repair.
Step-by-Step Repairs
Work through only the steps that apply to the component you identified during diagnosis. You don't need to replace everything at once.
Shut Off the Water Supply
Locate the shut-off valve on the supply line running from the wall to the base of the toilet. Turn it clockwise until it stops. Flush the toilet once to drain most of the water from the tank, then use a sponge and bucket to remove the remaining water so you can work cleanly.
Replace a Worn Flapper
Unhook the old flapper from the two pegs on either side of the flush valve seat and disconnect the chain from the flush handle arm. Take the old flapper to the hardware store to match the size, or purchase a universal flapper kit. Snap the new flapper onto the pegs, attach the chain to the handle arm leaving about half an inch of slack, and turn the water back on. Flush several times and repeat the dye test to confirm the seal.
Adjust the Float Height
If your toilet has a ball float (a large sphere on an arm), bend the arm gently downward or turn the adjustment screw at the base of the arm to lower the water level. If your toilet has a cylinder float (a sleeve around the fill valve), pinch the clip on the side and slide the float down the shaft. The water level should sit approximately one inch below the top of the overflow tube. Flush and observe to confirm water no longer reaches the overflow tube.
Replace the Fill Valve
With the tank empty, disconnect the water supply line from the bottom of the tank. Use adjustable pliers to unscrew the lock nut holding the fill valve in place, then lift the old valve straight out. Insert the new fill valve (follow the manufacturer's height adjustment instructions), hand-tighten the lock nut, and reconnect the supply line. Clip the refill tube to the inside of the overflow tube - not down into it. Turn the water back on slowly and adjust the float height per Step 3.
Test and Confirm the Repair
Turn the shut-off valve fully counterclockwise to restore water flow. Allow the tank to fill completely, then listen for any hissing or running sounds. Perform one final dye test to confirm the flapper is sealed. Flush two or three times and watch that the tank fills to the correct level and the fill valve shuts off cleanly. Replace the tank lid once satisfied.
When to Call a Professional
The repairs above resolve the overwhelming majority of running toilet issues. However, a few situations warrant calling a licensed plumber:
- The toilet runs again shortly after you've replaced the flapper and fill valve - this may indicate a hairline crack in the porcelain or a faulty flush valve seat that requires reseating or full tank replacement.
- You notice water on the floor around the toilet base, which points to a wax ring or supply line failure rather than a tank problem.
- Shut-off valves are corroded, stuck, or leaking, which carries a higher risk of causing water damage if forced.
A persistent or worsening leak can damage subfloor materials and lead to costly repairs, so don't hesitate to bring in a professional if you're unsure.